Put a Bird on it!
I've finished with my second bird!

 I put transfer paper under my design and traced my design onto the sleeve, then I started beading and embroidering.
 As with the first design I sewed the feathers to the back of my bird embroidery (which had been done separately on silk organza then cut out and fray-checked) before I appliqued it to the sleeve.
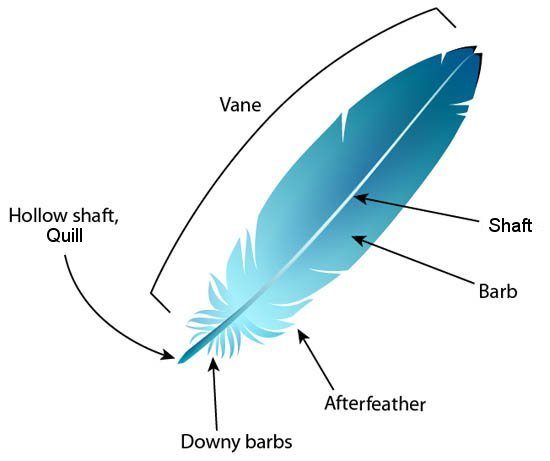
The feathers are goose biots and gold and green ringneck pheasant feathers. I stripped the fluffy downy barbs of the pheasant feathers off the shaft, leaving just the colored barbs at the end. (This chart of parts of a feather may be helpful.)
When I'd traced the design onto the fabric I also traced the bird shape around so I could leave a space for it and add it at the end.
Next up is the right lower sleeve design. Then I'll do the center back and finally the right chest/shoulder design. This has to come last because it has to be added after the bodice has been constructed since it overlaps seam lines.
I've got to be a little more careful with making sure the plastic lid is on my box of feathers because someone made off with this one and took several BITES out of it! I wonder who could have done that...


Thuffering Thuccotash, I thay guilty!
ReplyDeleteIt's gorgeous!
ReplyDelete